Learn how to log in with Google Account using PHP and MySQLi. You are trying to add social account login functionality to your web application, such as Login with Gmail account. Here’s a quick tutorial.
Google has an oAuth API that allows users to log in to web applications using their Gmail account credentials. After authentication with Google, users don’t have to complete a registration form. They can access the website directly after they’ve registered.
This feature will allow you to get more visitors to your website. It is easy to log in and it’s quick. You can also use this feature to share user session data with Google account data via MySQLi.
Read Also: 15 websites offering free web developer resources
Login to Google Account with PHP
Let’s get started. We have outlined each step.
To access Google Oauth API, you first need to create a Google Project. Follow these steps.
Steps to create Google API Console Project
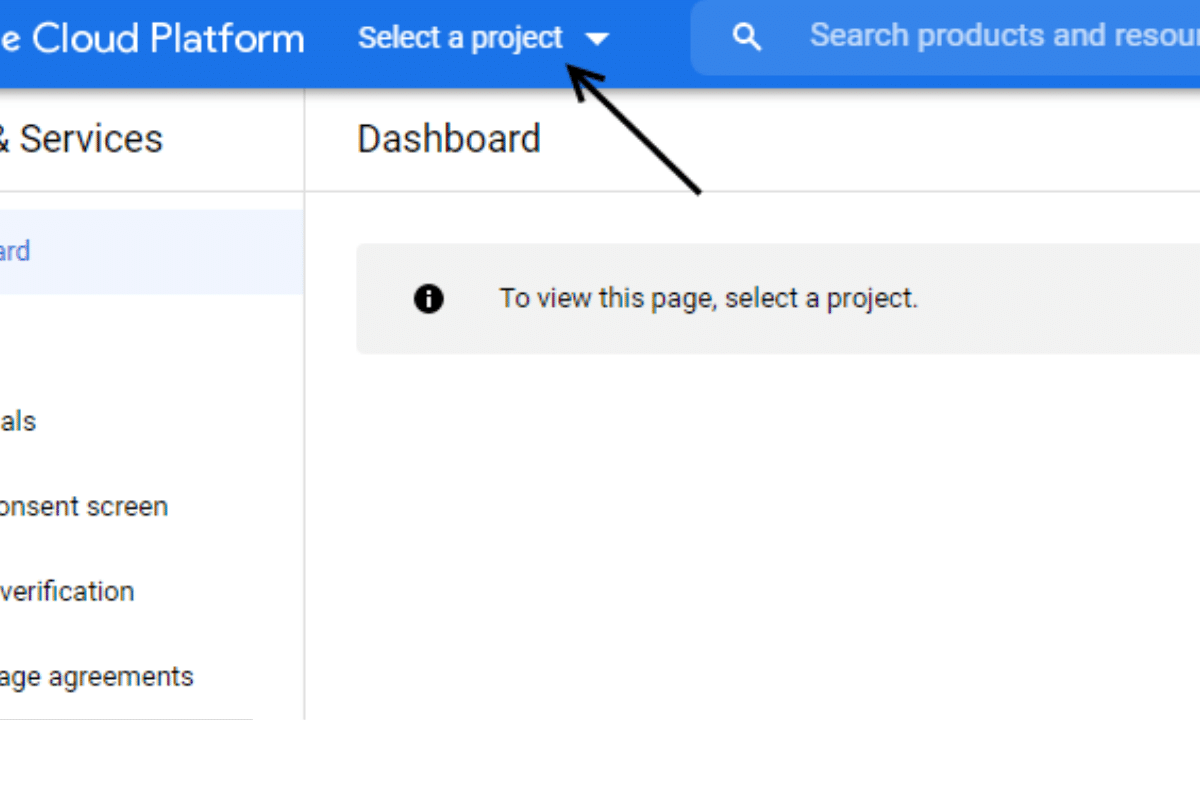
Step 1: Open Google App Console.
Step 2: Select the Select project option, as shown below.
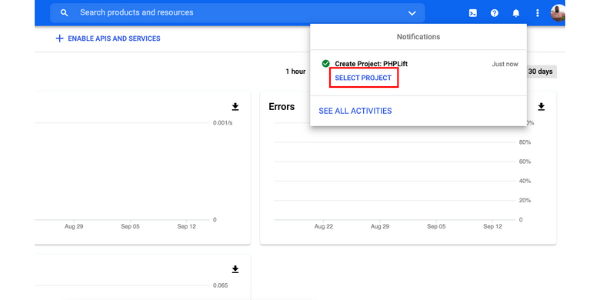
Step 3: You can search for projects that have been created previously or click on the ‘New Project’ option, to create a project.
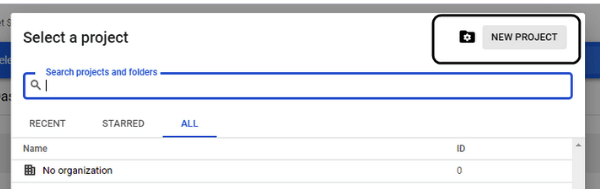
Enter your project name page and Google will automatically create a project ID. This name can be edited but must remain unique globally.
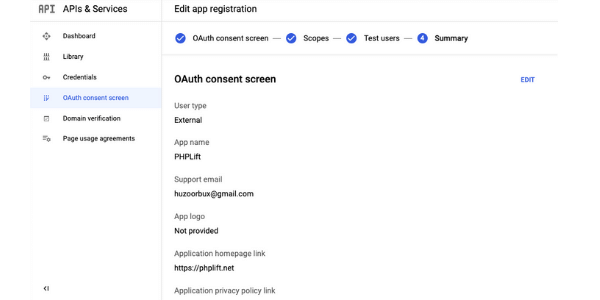
Step 4: Next, click on the OAuth consent screen option. Choose your user type according to your requirements.
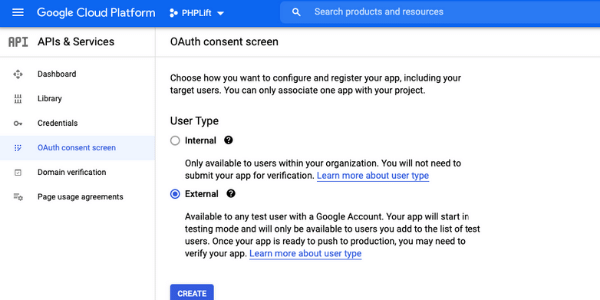
Enter your application name, support email ID, and authorized domains, then click on Save to save. You can follow the steps as shown in the image below to choose the scope.
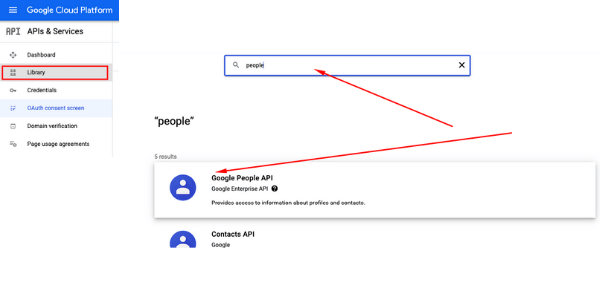
Step 5: Select Library “People”.
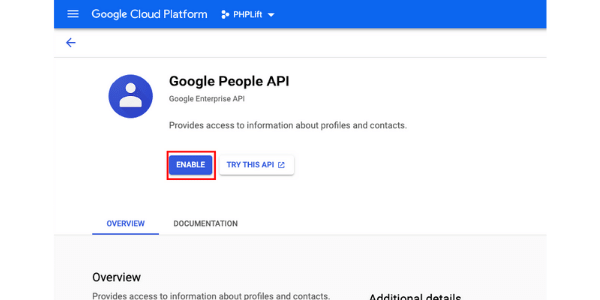
Step 6: Enable Library
Step 7: Click on “+ CREATE RESIDENTIAL”. It will prompt you to select the type of credential that you want to create.
Select the OAuth Client ID option.

Step 8: Next, select your Application type and ‘Web app’. It all depends on where you want to implement Login With Google functionality. You can choose the appropriate option depending on your requirements.
You will need to submit a callback URL for your domain under the Authorized redirect URLs section. As we did for our web app:
Example Redirect Url: https://www.yourdomain.com/callback.php

This URL will be used to send the google API code and retrieve user profile data.
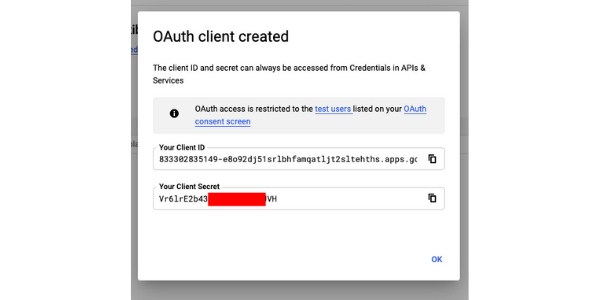
Your Client ID for the web app has been created successfully. For further configuration on your web app, take down your Client ID & Client Secret Key.
Install the Google PHP SDK client library
Login with Google account functionality will be implemented via configure Google PHP SDK Client Library. This will be done on a webserver.
This library can be configured in two ways.
Via composer:
Use the below command to install this library via composer
$composer require google/apiclient:”^2.0”
Download the library files and upload them manually
Download the most recent version of the client library by visiting the Google API page.
In this example, we manually uploaded the Google PHP Client Library to the web application server.
Login with Google Account:
Script Files
- config.php
- index.php
- callback.php
- database.php
First, create a config.php file to handle the Google API code initialise and API keys, we have put a redirect URL in Google Client Project https://www.yourDomain.com/callback.php.
config.php
<?php

require_once 'vendor/autoload.php';


$google_app_id = 'your_google_app_id';

$google_app_secret = 'your_google_app_secret';

$google_callbackurl = 'https://www.yourdomain.com/callback.php';


$google_client = new Google_Client();

$google_client->setClientId($google_app_id);

$google_client->setClientSecret($google_app_secret);

$google_client->setRedirectUri($google_callbackurl);


$google_client->addScope('email');

$google_client->addScope('profile');

$google_client->addScope('https://www.googleapis.com/auth/photoslibrary.readonly');
Create an index.php file for login using the Gmail account button. Use the code below.
index.php
In this index.php file, we have pointed to google client auth URL function $client->createAuthUrl().
<?php

include("config.php");

?>

<div>

<a href="<?php echo $google_client->createAuthUrl(); ?>">Login with Google</a>

</div>
When the user clicks Login With Google button it will take the user to the Google authorization page once you allow permission it will redirect you to the callback page with the authorization code for the callback.php File.
callback.php
<?php

require_once 'config.php';

require_once 'database.php';


if (isset($_GET["code"])) {

//It will Attempt to exchange a code for an valid authentication token.

$token = $google_client->fetchAccessTokenWithAuthCode($_GET["code"]);

//This condition will check there is any error occur during geting authentication token. If there is no any error occur then it will execute if block of code/

if (!isset($token['error'])) {

$_SESSION['logged'] = 'true';

//Set the access token used for requests

$google_client->setAccessToken($token['access_token']);


//Store "access_token" value in $_SESSION variable for future use.

$_SESSION['access_token'] = $token['access_token'];


//Create Object of Google Service OAuth 2 class

$google_service = new Google_Service_Oauth2($google_client);


//Get user profile data from google

$data = $google_service->userinfo->get();

$query = "INSERT INTO `googleUsers`(`google_id`, `name`, `email`, `image`) VALUES ('" . @$data['id'] . "', '" . @$data['given_name'] . " " . @$data['family_name'] . "','" . @$data['email'] . "','" . @$data['picture'] . "')";

mysqli_query($connection, $query);

echo "Account Created !!";

} else {

    header("location: index.php");

   }

}
These are the only steps to verify that the user is able to authenticate his Google account. After clicking the Login with Google button, his profile information will be displayed on the callback.php file.
database.php
<?php

// Database connection

$host = 'host';

$user = 'user';

$pass = '*******';

$database = 'database';

$connection = mysqli_connect($host, $user, $pass, $database) or die(mysqli_error($connection));
To create a database table for users’ data, copy and paste the MySQLi query code.
--

-- Table structure for table `googleUsers`

--

CREATE TABLE `googleUsers` (

`id` int(11) NOT NULL,

`google_id` varchar(200) NOT NULL,

`name` varchar(200) NOT NULL,

`email` varchar(200) NOT NULL,

`image` text NOT NULL,

`created` timestamp NOT NULL DEFAULT current_timestamp()

) ENGINE=MyISAM DEFAULT CHARSET=latin1;

--

-- Indexes for table `googleUsers`

--

ALTER TABLE `googleUsers`

ADD PRIMARY KEY (`id`);

--

-- AUTO_INCREMENT for table `googleUsers`

--

ALTER TABLE `googleUsers`

MODIFY `id` int(11) NOT NULL AUTO_INCREMENT;

COMMIT;Conclusion:
These steps will help you implement the Login with Google Account function on your website. This will increase your subscribers. Users don’t have to sign up. They can log in directly via a Google account.

2 Comments
Márcio Sousa
September 15, 2021 at 9:13 amThanks. Your tutorials are great. Continue posting. Greatings from Portugal.
vinayak
December 7, 2023 at 10:21 amgettin 500 error